Mom is pleased with any attention from her household. Please your mom with a colorful gift in the form of a DIY mother's day greeting card.
Do-it-yourself postcards for mother's day: materials and methods
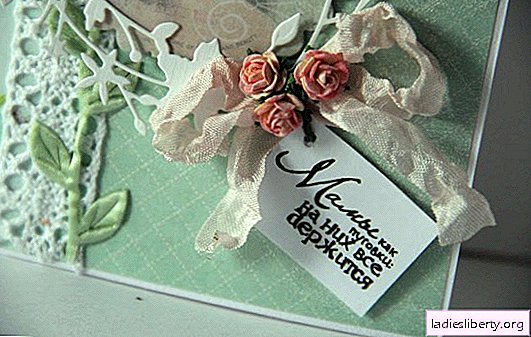
In order to make a beautiful card you need to have beautiful paper, ribbons, markers or pencils on hand. The card should be bright, transmit your warmth and tenderness.
Bouquet of love and tenderness

This card carries a lot of meaning and with its appearance gives the arms of children's hands, which are collected in a large bouquet. For this craft, you will need cardboard, colored paper, glue, a bow and markers.
Cardboard can be used both color and embossed. Colored paper should be beautiful with rich colors. A bow can be either purchased at a store ready-made or made independently from ribbons.
We prepare the details. To do this, on colored paper (on the back), attach and draw a pencil around the outline of the children's palm of both hands. Cut the resulting image. Make such blanks as much as possible using paper of different colors.
A postcard can be either folding or unfolded. If you will make a folding card, then the bouquet is best placed on a wrapper, and write the words of desire inside.
You need to glue the bouquet from the top point, gradually descending to its base. Glue the uppermost palm, below, glue a row of 2-3 palms, then a row of 4. Thus, the bouquet will turn out magnificent and voluminous. Variety of colors, do not glue two palms of the same color next to each other.
Having glued all the palms you need to make the stem of the bouquet. To do this, cut out long thin strips of 7-9 pcs from green paper. and glue them one on the other along the bouquet, preferably obliquely. Position them so that the lateral edge of one strip lies and slightly covers the lateral edge of the other strip with an overlap.
Glue a beautiful bow at the junction of the palms and the stem. If you want to make a bow with your own hands, then such a simple technique will do.

Take two types of ribbons in contrasting shades. Fold in four layers one tape and another tape in the same way. Lay one on top of the other and tie them in the center. Spread the edges of the loops crosswise in the form of the letter X.
Glue the resulting bow on the bouquet and start writing nice words for mom. The name of the card can be written something like this: "Bouquet of love and tenderness for dear mom Name", and below the quatrain with wishes. Do not forget to indicate from whom this gift and year of manufacture. A nice gift in the form of a greeting card for Mother's Day is ready.
Greeting card with volumetric flowers.

With such flowers you can arrange a card for Mother's Day. To do this, you will need a base for a postcard in the form of colored or openwork cardboard, white papers, watercolor or gouache of various shades or colored paper, glue, beads (rhinestones or buttons) and multi-colored markers.
Before you make flowers, paint plain white paper with paints and let it dry. It is necessary that it would turn out several shades of the same color, for example dark red, light red and pale pink.
If you do not want to paint, you can use colored corrugated paper or colored plain paper.
Cut out 9 circles of paper of different sizes in diameter (6 cm., 5 cm. And 3 cm.). Three mugs for each size. In this case, circles of the same size should be the same color. Now, on each part in the direction from the edge to the center, cut strips up to 0.5 cm wide, not more. Cuts should be located at the same distance from each other.
Fold the resulting terry circles on top of each other and glue in the center. The layers of the circles look like this: the bottom three are the big circles, the top three are glued a little smaller, and the top three are the smallest. Glue a beautiful bead or rhinestone or button in the middle of the flower. One flower is ready.
For the beauty of the postcard, make as many of these colors as possible and arrange them more closely together or around the perimeter of the postcard.
Next to the flowers you can sign, for example: "Happy Mother's Day!", And inside the card you can write congratulations and poems.
Postcard in the style of quilling.
This technique is not difficult to master even a novice master. It will be gentle and difficult to look at a card with flowers or patterns in the style of quilling.

For work, you need special colored paper for quilling, needles, glue, cardboard, a stencil, rhinestones, sequins and a knitting needle on which paper is wound can come in handy.
The technique consists in twisting multi-colored stripes of paper and giving them a various shape, and then the resulting element can either be glued onto a plane or a volumetric composition can be made with it.
Strips of multi-colored paper are wound in the form of a spiral on a thin object. For winding, you can use a needle, a knitting needle or a thin rod from a ballpoint pen.
In order to get a beautiful pattern, you need to bend it with your hands or with the help of foreign objects (for example, press it against a ballpoint pen - you get a semicircle, press it to the edge of the table - you get a right angle, and so on).

Here's what you can do elements of paper twisted into a spiral.

Assemble several resulting elements into one shape. So, for example, five petals of red color are glued together on each side in a circle. It turns out a flower. Green petals stick together with each other in the form of a short flight of stairs - a stem with leaves is obtained. In order for the parts to stick, they are fixed with needles until the glue dries.
More complex elements can be made by combining several parts of different shapes and sizes.
When creating a composition, it is important: first small parts are fastened together, and only after that the whole assembled product is glued to the plane. In our case, such a plane is the outside of the postcard. So you can arrange the flowers on the card.

Be sure to write beautiful words of congratulations and wishes for good health to your beloved mother.
DIY Mother's Day Cards: Professional Tips
• Use beautiful cardboard as the basis for your postcard. You can decorate it by cropping and rounding corners. You can also glue a thin ribbon edging around the perimeter of the postcard.
• In the inside of the card on the page or at the back of it, write down the date and year of operation in small letters. Imagine how it will be interesting for your mother, sorting through the old cabinets, to find your handmade card. She will definitely want to remember when you made this gift for her and the date here will be welcome.